friday my day
OT: yesterday, i got my first modern drummer issue since i subcribed last june 22. its ringo starr on the cover and its a really interesting to read on how he does what he does.
i know, time to post some more progressive pics. this will get a lot more interesting in a couple of days. yeah really.
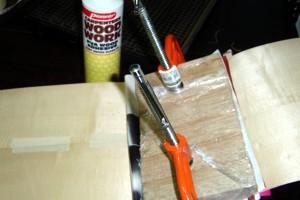
here is the mold i made with the compass thingy, im gluing them first by pairs and then glue the pairs together. i forgot to buy a 10" clamp to hold them together but its too late go to shopping. i used cans of paint on top each part of the mold just to apply pressure. you can see this on the concave part.

now let's go off to the more interesting part which is preparing the veneer plies for glueing.
step 1. since i only have 4" wide strips, i have to use strips side by side cut to the proper length of the shell's inner diameter. then prepare the second ply the same way but must be a couple of millimeters longer than the first. i have an excel file to calculate the exact lengths but i havent added the glue thickness on the computation yet. i'll post the excel file too as soon as i get some measurements.
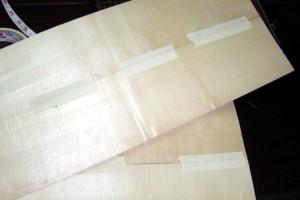
so crude, i used masking tape to join the strips side by side but hey, it works can you argue with that?
step 2: apply glue on one side of the first or second ply, doesnt matter which one as long as you do it on the area that will be clamped. do it fast too because the glue wont wait for you.
i used a piece of cardboard 4"x4" to apply the glue in an even fashion. from the pic above, i aligned the two sheets with the shorter sheet on top. i then used some paper on the bottom and top of the plies. this is just to make sure that the veneers dont get glued to the mold. what's amazing is that the paper doesn't seem to stick on the veneer too. im using a weird glue. put the clamps on both sides nice and tight. then wait for 30 minutes for the glue to settle.
step 3. after 30 minutes, remove the clamps from the mold and behold, the veneer retained the shape of the mold.
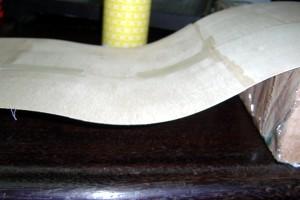
here's another one with the sheet turned over

step 4. close the inner ply first. as you can see, there's a shell forming. all you have to do after that is to add more plies on top. simple.

here's a close up of the mold and clamp

i have to give credit to the guy who wrote a guide on this and for answering my emails, a very special thanks to mr. massimiliano signori.
posted by D` Pimp @ 9:21 AM
0 comments
![]()


0 Comments:
Post a Comment
<< Home